Tutorials:Cadence:CreatingNewLibrary
Creating a new library
Start the Cadence software and the Library Manager will automatically pop up. In the Library Manager click on: File → New → Library
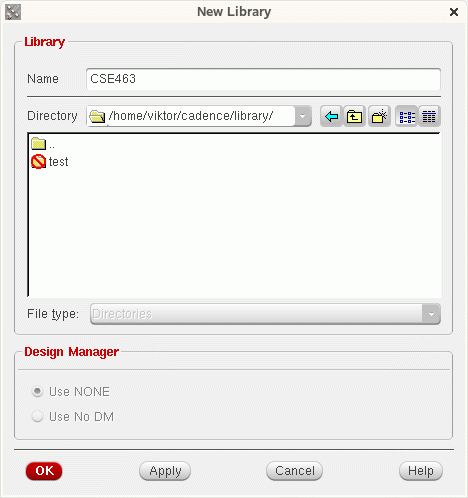
A dialog box should appear and you should fill the appropriate boxes as shown in the picture bellow. Note: you should store your new libraries in a separate directory. In this example, create a directory named "library" under your cadence directory as shown in the figure bellow:
Press the OK button. You can choose any name for the library. In this case we have chosen CSE463 for the library name. Cadence will automatically create a subdirectory named CSE463.
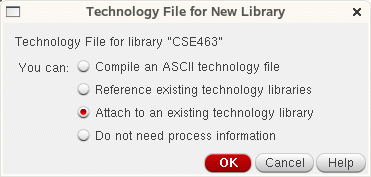
Next you will see the "Technology File for New Library" window. This window allows you to specify the technology you will use for your IC design. For our class, we will use AMI 0.6micron technology. Select the option shown in the figure bellow:
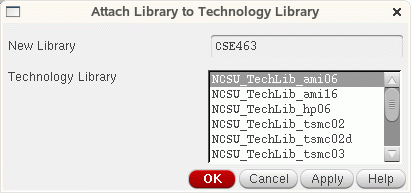
Press the OK button. The "Attach Library to Technology Library" will appear. Select the NCSU_TechLib_ami06 option and press OK.
A new library named CSE463 has been created in the directory that was specified above. This step is performed only once. In this library, new cells will be designed such as inverters, nand, nor, etc.


